



Showing posts with label tutorials. Show all posts

Tuesday, November 27, 2012

Printable Family Home Evening Charts are SO EASY


If you want to use one (or all) of our printable FHE charts but aren't sure how they work, then let me tell you how easy they are!

First of all, you get your download and print the pages on cardstock (which is just thick paper).  You should have two pages of background image and then a page or two with the pieces.  If you have a big family, make sure to print enough pieces for everyone.

Next, just cut everything out and cut around the background image.

Now you have to hook your two background pieces together.  I suggest lining them up perfectly and taping them all along the backside.

Then write the names of your family members on the backsides of the pieces.  Each person gets a piece of their own.

And then you need to laminate everything or cover it with clear contact paper.  I always use contact paper because, depending on where you go, it's a lot cheaper than lamination.  And besides, I like to plop down in front of Netflix if I have a lot of cutting and stuff to do and lamination would require that I leave my house in the middle of everything.

Next you need to cut out your pieces again - because that is the bane of covering them.  (But it's worth it, because the pieces will last SO MUCH LONGER.)


So now comes the time to use your chart (which is also super easy to do).   Hang the background image somewhere your whole family will see it.  You can stick the pieces to the background using a few things.  You can get some of the sticky backed velcro and attach it to each piece and the background image so that the pieces can just peel on and off.  You can hang the chart on the fridge and put strong magnets on the backs of your pieces.  Or you can be lazy and do what we do - we just get a few pieces of stick tack and just use that to stick the pieces on.

Each week you need to rotate the pieces so that everyone in your family has a turn doing something for FHE.  If your family is large you won't all be able to participate each week so make sure to rotate people in.

And there you have it - an easy printable FHE chart!  It will help everyone get organized and excited about having Family Home Evening each week.


Tuesday, February 7, 2012

Week of love: the Love of Learning

Learning is great as an adult, but WAY more fun when you're a kid. (Which is why I like making stuff for my kids to learn from - it brings back a little of the excitement I used to have at their age.)


For today's lovey special you can get all of the products in the Weesmart Learning Section of our shop for 35% off!

And there are some brand new products you can choose from!


These craft stick puzzles are my newest favorite thing to do with my preschoolers, and they're easy to make!

Just print the puzzles on thick paper and cut around the outline on each.  Then cut a piece of clear contact paper to go on the fronts.


Once you have the contact paper stuck to the fronts of the puzzles, slice the pieces on a paper cutter (using the lines on the puzzles as a guide - - speaking of which, if you look closely enough you'll see that I didn't actually cut on the lines.  That is because I was a total doofus when I printed these and had measured wrong for the craft sticks - but DON'T WORRY, I fixed them before uploading the zip files on our site, so they are totally the right size now.)


Glue the strips to large craft sticks.  I used a sponge tip on some Scotch clear glue, and it worked beautifully.


Once it's all dry, it's time to play!  Here are just a few of the puzzles I have put together for my kids using the new files:


Yeah, I really like craft stick puzzles.  And my destructo kids can't ruin the pieces like the paper puzzles I've printed for them before.  YAY.

AND

While you're shopping in the discounted Weesmart Learning Section, don't forget to check out our brand new Valentine Magnet Pairs!


These are 1" discs that you can print, cut and glue to the backs of clear glass craft discs.  Then hot glue a magnet to the back and your kids can play a fun Valentine version of a matching game as they group the words with the corresponding picture.  IT'S FUN!

 (FYI - it's really not very easy taking pictures of clear glass craft discs, because those things are way super reflect-y.)

Now go load up your cart - because tomorrow is going to be a different deal of LOOOOOVE!

Saturday, December 10, 2011

Christmas Deals DAY ONE: Christmas Goodies!

We want to start off our spectacular Christmas Deal Week with some brand new holiday goodies!  (Make sure to scroll down and catch all FIVE parts of the deal!)


FIRST: Our entire Christmas section will be 20% off all day (but only today).  No need to use codes, the discount is already applied!


SECOND: We have 8 BRAND NEW Christmas products!  So make sure to throw them in your cart while you're getting the discount. :)


THIRD: Here's a tutorial on how to put together the Printable Nativity Playset:

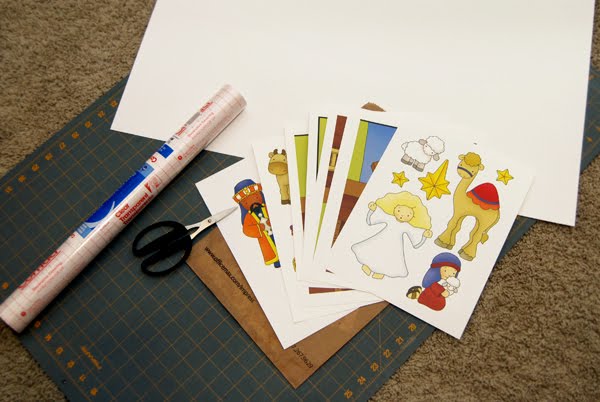
First you'll have to buy the playset, download and print it.  On thick paper, preferably. Then cut the pieces apart by groups.  Like so:


Then cover both sides with clear contact paper.  You could also laminate them, but I like clear contact paper better.  (It's cheaper, and I can do it at home.)


Then, you'll want to cut out the pieces on the lines.  Except, AND THIS IS IMPORTANT, don't mix up your pieces.  Because there are a gabillion of them, and you don't want to confuse who's feet are whose and stuff like that.  This is how I kept mine organized:


Then, take a big fat needle and poke through all the x's on each piece, like this:


This will make it SO MUCH EASIER to put your brads in.  Trust me on this, I have experience.  Once your x's have been prepped, you'll want to line up your pieces and push a brad through the holes on both layers.


And then, you just repeat the process for each character.


I suggest poking holes and inserting brads a character at a time - you know, that whole organization/confusing feet thing.  I also suggest using some kind of mini-brad.  The big gold ones are way too clunky and huge-ish.

Once you have your characters complete, you can play!  The brads allow for movement, which is super fun.


FOURTH: You can win a Free Christmas Album Download!! 

Jason is a fantastic concert pianist that has been featured on the Ellen Degeneres Show, CNN and has played several concerts with Jon Schmidt. He plays the piano backwards (and upside down!) and is known for his delightful parodies and inventive playing. (Here are some videos of Jason from his YouTube page http://www.youtube.com/user/jasonlyleblack)

We're giving away Jason's brand new album of original arrangements of Christmas songs (the album has 9 MP3's)!  All you have to do to enter is comment on this post about how much you want one.  (EASY PEASY.)  We'll be randomly choosing FOUR WINNERS on saturday, December 17th at 10:59 PM.

And if you don't win the whole album, here's a single of "Oh Come All Ye Faithful" that you can download FOR FREE:  http://jasonlyleblack.com/free/


Check back tomorrow for day two of our Christmas Deal Week!

Monday, November 29, 2010

Nativity Advent Calendar how-to

We've talked so much lately about our advent calendars that I thought I'd show you how easy it is to put one together.

First, buy an advent calendar in our shop (or hopefully you've gotten a free one)!

Then gather your supplies:

You'll need to get your file printed. Do you see my plug for Office Max right there? That brown paper bag? Yeah, that's my free plug. Your welcome, Office Max. In all seriousness, they have excellent prices when it comes to printing in full color on cardstock.

You'll also need: scissors, clear contact paper and a regular poster board. (Poster board is optional, but I would recommend it for this particular project.)


Trim around all the pieces. Take off any excess white parts. Then cover both sides in clear contact paper. It will look something like this:

You will then need to trim around the edges of all the pieces. Since there are 25 of them, I suggest enlisting your husband's help. Make it sound really exciting, then give him the scissors that dent your fingers and leave you bruised for weeks. (My husband puts up with a lot.)

You will also need to trim around the edges of the background image. Since it comes in four parts it's best to trim before covering in contact paper. I mounted mine on the poster board which made matching things up easier and made the background much more sturdy.


Once the background is mounted, I trimmed around the poster board edges and then covered it in clear contact paper too. I covered both sides for good measure.

After you have everything trimmed it should look like this:

You could be done there. But I'm giving this particular advent calendar to some family friends so I took things a teensy bit farther. I made small a fabric basket to put the pieces in (I put the pieces in a ziplock baggy first, because I didn't want to lose any). Then I included a new package of yellow sticky tac (I love that stuff) so that our friends have a way to hang the pieces on the background.

And I ended up with this:

Besides the cutting, which is mostly just torturous if you have the wrong scissors, this is a fast and easy project. And the coolest part is that it can be used year after year after year after year!

But hurry and get yours put together - - it's almost December!!