


 We've talked so much lately about our advent calendars that I thought I'd show you how easy it is to put one together.
First, buy an advent calendar in our shop (or hopefully you've gotten a free one)!
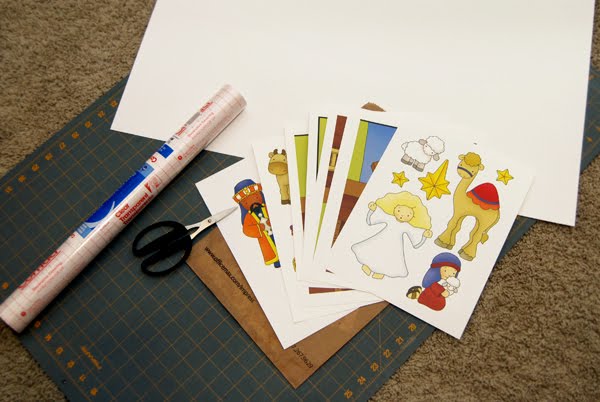
Then gather your supplies:
 You'll need to get your file printed. Do you see my plug for Office Max right there? That brown paper bag? Yeah, that's my free plug. Your welcome, Office Max. In all seriousness, they have excellent prices when it comes to printing in full color on cardstock.
You'll also need: scissors, clear contact paper and a regular poster board. (Poster board is optional, but I would recommend it for this particular project.)
Trim around all the pieces. Take off any excess white parts. Then cover both sides in clear contact paper. It will look something like this:
 You will then need to trim around the edges of all the pieces. Since there are 25 of them, I suggest enlisting your husband's help. Make it sound really exciting, then give him the scissors that dent your fingers and leave you bruised for weeks. (My husband puts up with a lot.)
You will also need to trim around the edges of the background image. Since it comes in four parts it's best to trim before covering in contact paper. I mounted mine on the poster board which made matching things up easier and made the background much more sturdy.

Once the background is mounted, I trimmed around the poster board edges and then covered it in clear contact paper too. I covered both sides for good measure.
After you have everything trimmed it should look like this:
 You could be done there. But I'm giving this particular advent calendar to some family friends so I took things a teensy bit farther. I made small a fabric basket to put the pieces in (I put the pieces in a ziplock baggy first, because I didn't want to lose any). Then I included a new package of yellow sticky tac (I love that stuff) so that our friends have a way to hang the pieces on the background.
And I ended up with this:
 Besides the cutting, which is mostly just torturous if you have the wrong scissors, this is a fast and easy project. And the coolest part is that it can be used year after year after year after year!
But hurry and get yours put together - - it's almost December!!

1 comment:
Great thanks to sharing........It is important that take good care in making the best use of recycled paper.
Green Printing
Post a Comment